Adding a feature to my game from start to finish
I thought it might be interesting to look at how a feature gets added to a game. In real life, the process is undoubtedly more involved; this is just a summary of the main steps.
Planning
The first step is to think it out. Having a good idea and plan of how to implement will save you a ton of work later on.
The game seemed a little too simple to me, with too many checkpoints. Failure had almost no consequence. So I got rid of the (too many) checkpoints and went with something akin to the bonfires in Souls-like games. I’ll call them “beacons” and they’ll resemble some kind of sci-fi antenna. Once discovered, you can activate it, and the next time you fall to your demise, you’ll respawn there. The game progress is still saved continuously, only the respawn point location is set.
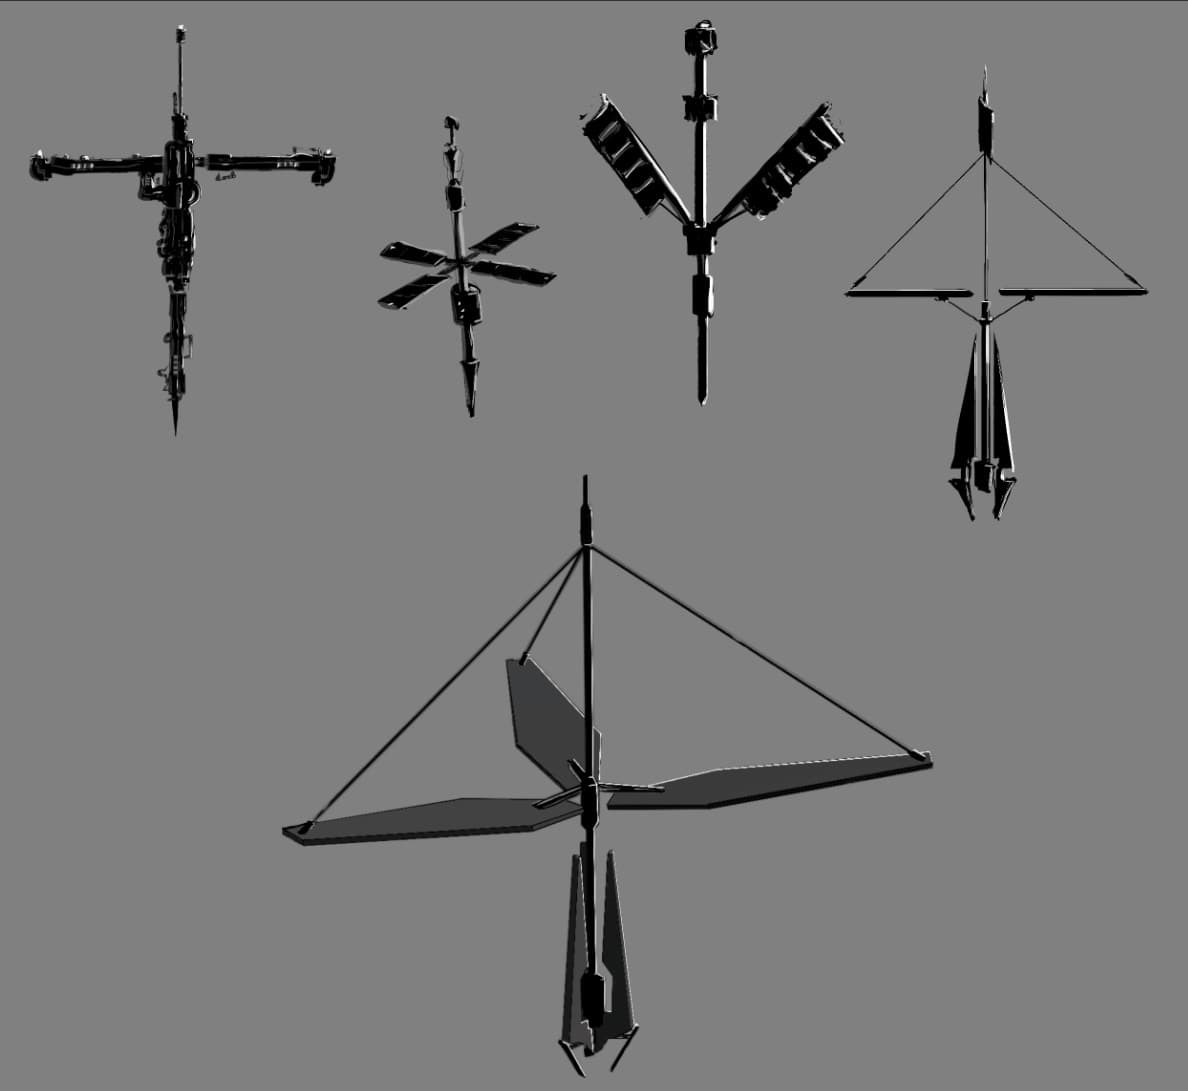
Concept Art
When I first had the idea, I started with a few sketches on my phone. Later, at the computer, I drew some concept art after searching online for images to use as inspiration. Nothing too advanced, as I haven’t drawn in ages, still getting back into it.
3d Model
Then, using Blender, I created a 3D model based on the concept art. I only did some rough UVs because it’s likely that the model will be tweaked a little more later.

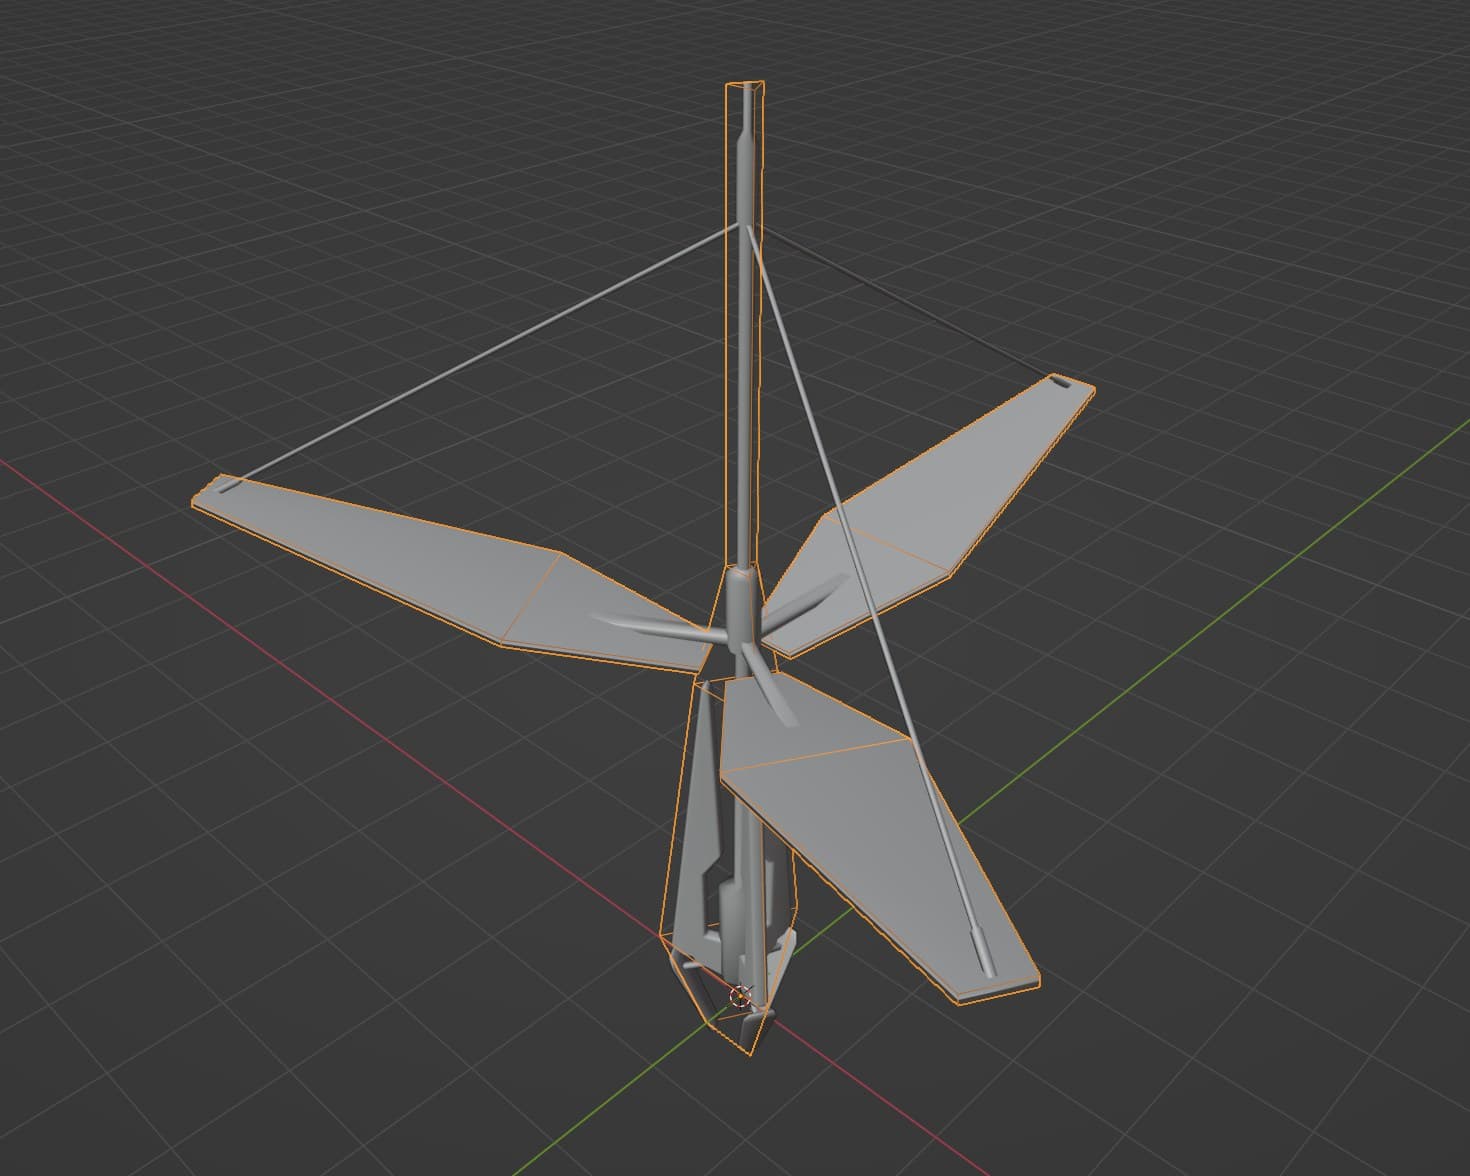
Adding functionality
Implementing gameplay functionality and testing it in game at this stage is critical since it frequently leads to the discovery of issues with the 3d model. For example, I realized I had forgotten about the collider mesh, so I created one before continuing. It’s the little orange outline visible in the screenshot below. This mesh is a simplified hull around the basic volume of the base 3d model.
Since the majority of the requirements were already in place, adding this feature was not too complex. I connected it to the interaction system so that the player could activate it by pressing a button when close to it. Once activated it sets the current respawn location near itself. This location is also saved on disk for use when the game is launched again.
In the video below you can see how it gets positioned in the game world using the engine editor tools. The using a custom script I adjust the direction the player will look at when they respawn there.
Making it pretty
Now that the 3d model is done, and there likely wont be more big changes, its time to make it look good.
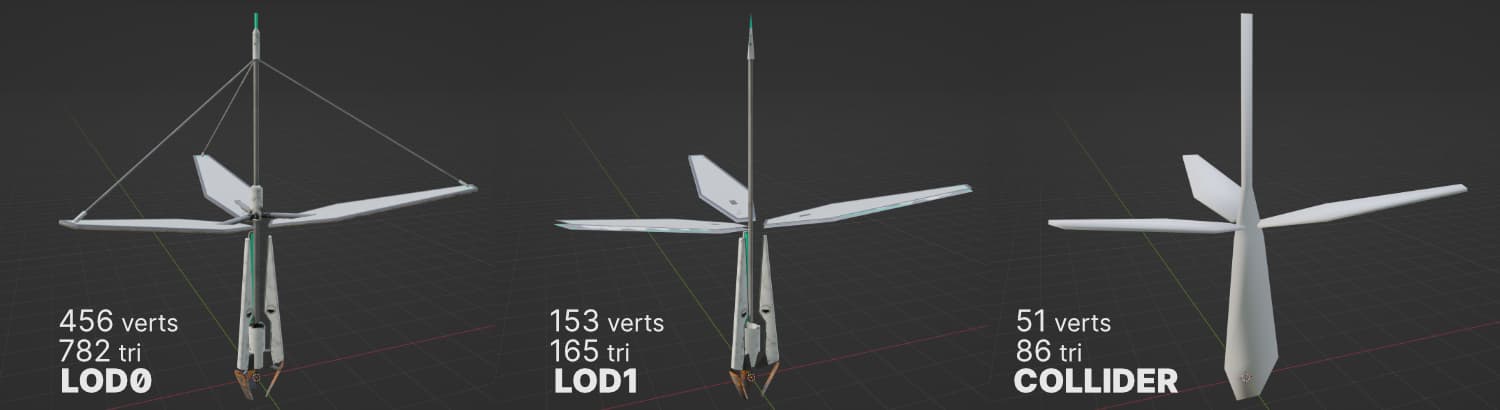
I started by refining the UVs in Blender. Around this time I also created a lower LOD version of the 3d model. You can’t really see much difference (between LOD0 and LOD1) in the screenshot below, but that’s the point! At runtime it will be used to render beacons that are too far away to notice small details and thus save performance.
Texturing was done in a mix of Substance Painter and Quixel Mixer.

Finished
And here’s the result in gameplay, spiced up with sound effects, UI and particle effects.
And then from here the feature will go to playtesting. Then based on the gathered player feedback it will be adjusted and balanced. In this case with the save-beacons what’s going to be adjusted is how frequently you find them and in which locations.
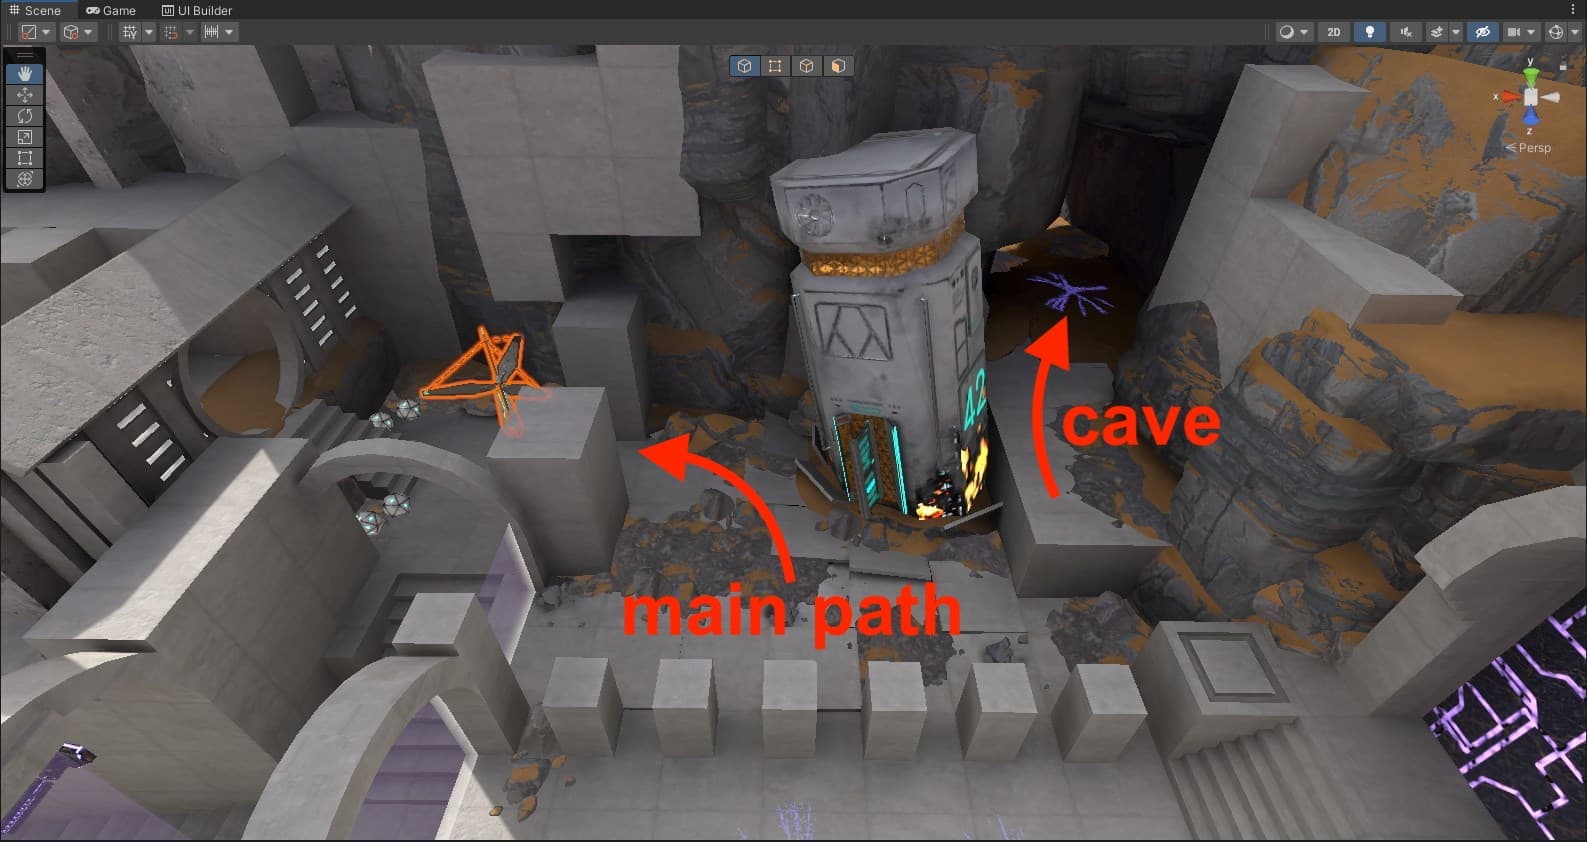
Here’s an example. In this location the player can follow the main path to the left or visit the cave on the right. However if the player were to die over in that cave they would have never encountered the beacon that was on the left there.
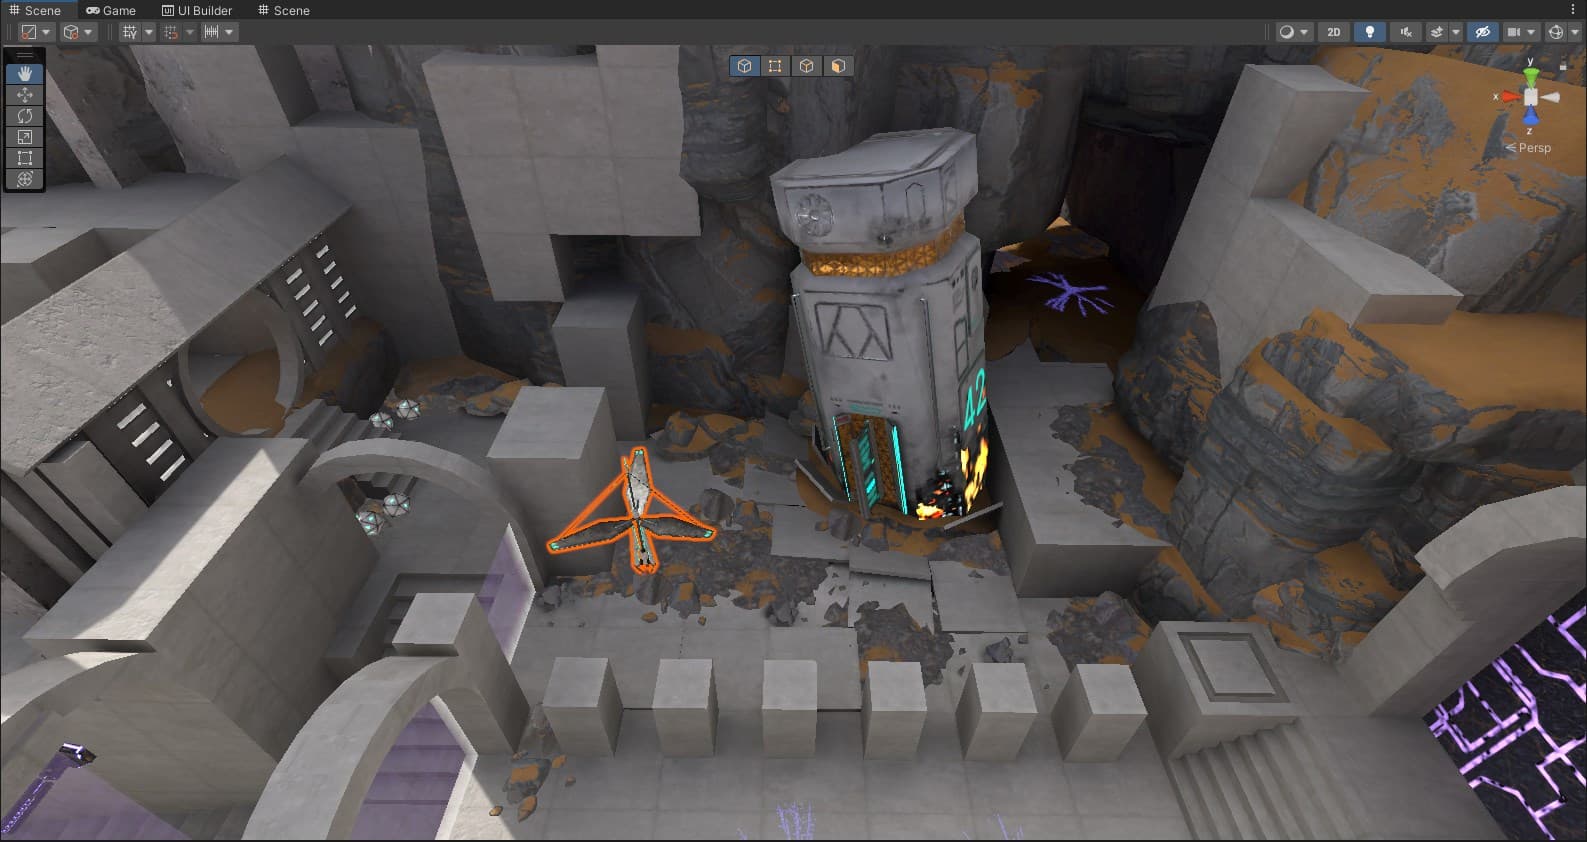
So I moved the beacon to be found a bit earlier. In this spot the player can see it at the same time of the cave. They don’t have to use it they don’t want but at least they are making the decision themselves.
This was something that I noticed myself so I fixed it right away. But only letting other people play the game will bring out where the issues are.
Usually when the update is almost ready I send it to some people for them to play and listen to their feedback. This will be a private build of the game at the beginning, but later it could also move to public testing.
The testers record the screen while they play it and annotate the timestamps in the written feedback. Then I can read the feedback while watching along their recording and see what they were doing when they encountered a bug. Or in what specific location they were for which they suggest a change should be made.
And when I’m confident that all the major issues are solved and I’m happy with how it works then it will get published as an update for all the players.
And that’s it (more or less)!